
 Written by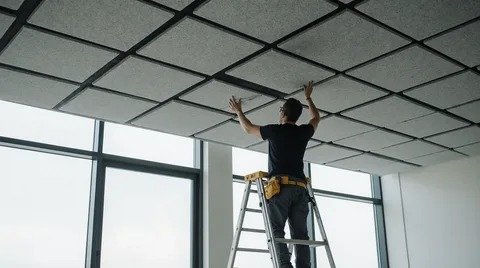
Few household annoyances are as frustrating as noise coming through the ceiling. Footsteps, dragged furniture, a bouncing child, a loud television or a late-night conversation can all travel straight into your living space from the unit above. Even in single-family homes, a noisy upstairs or a home theater below a bedroom can make a space hard to enjoy.
Ceiling soundproofing is more complex than treating a wall, because ceilings deal with two very different kinds of noise at once. This guide explains how ceiling noise works, which solutions are effective, what they cost across the USA, and how to choose the right approach for your home.
Why Ceilings Are Hard to Soundproof
In most American homes and apartments, the ceiling below is attached directly to the floor joists above. That means any vibration in the upstairs floor travels through the framing and into your ceiling drywall, which then radiates sound into your room like a speaker.
Two types of noise are involved:
- Airborne noise: Voices, music, television and barking dogs. These are rated using STC (Sound Transmission Class).
- Impact noise: Footsteps, dropped objects and moving furniture. These are rated using IIC (Impact Insulation Class).
The International Building Code generally calls for floor and ceiling assemblies between dwelling units to reach STC 50 and IIC 50 (or slightly lower when field tested). Many older buildings and basic renovations fall below that, which is why ceiling noise complaints are so common in apartments, condos and multi-story homes.
Impact noise is usually the harder problem. It is low in frequency, carries through solid structure, and needs more than a thin layer of material to control.
The Four Principles Behind Effective Ceiling Soundproofing
1. Mass. Adding dense layers, such as additional drywall, makes it harder for sound energy to move the ceiling surface.
2. Decoupling. Separating the ceiling drywall from the joists with isolation clips or resilient channels breaks the vibration path. For impact noise, this is usually the most valuable step.
3. Damping. Viscoelastic damping compound between drywall layers turns vibration into a small amount of heat, especially helping with low-frequency noise.
4. Absorption. Filling the cavity with mineral wool or dense acoustic insulation stops the space from resonating.
The strongest results come from combining several of these, not relying on one product.
Ceiling Soundproofing Methods That Work
1. Seal Gaps and Penetrations
Before adding materials, close every air leak. Seal the ceiling perimeter, gaps around light fixtures, vent openings and any cracks with acoustical caulk. This is a low-cost step that improves every other upgrade.
2. Add Insulation Above the Ceiling
If the joist cavity is accessible, fill it with mineral wool or dense acoustic batts. This reduces cavity resonance and can lift performance noticeably. It also helps with energy efficiency.
3. Add a Second Layer of Drywall With Damping Compound
Installing a second layer of 5/8-inch drywall with damping compound between the layers is one of the most common ceiling upgrades. Stagger the seams, leave a small gap at the edges and seal it with acoustical caulk. This improves both airborne and, to a degree, impact performance.
4. Decouple the Ceiling With Clips and Hat Channel
Sound isolation clips with hat channel create a floating ceiling that is mechanically separated from the joists. Compared with basic resilient channels, clips are generally more forgiving to install and perform more consistently. Combined with insulation and double drywall, a decoupled ceiling is one of the most effective solutions for noise from above.
Installation quality matters. If a single screw goes through the channel into the joist, it can create a “short circuit” that carries vibration and weakens the entire system.
5. Build a Drop (Suspended) Ceiling
Where headroom allows, a suspended ceiling hung from isolation hangers adds an air gap and independent structure. Acoustic ceiling tiles inside a grid can improve room acoustics, but on their own they do little to block noise from above. Pair them with insulation and mass for real isolation.
6. Use Mass Loaded Vinyl Where Space Is Limited
Mass loaded vinyl (MLV) adds density without much thickness. It is most effective when installed continuously without gaps and combined with decoupling and insulation, rather than used alone.
7. Treat the Source if You Can
If you own the space above, or can discuss it with a neighbor or landlord, adding rugs with dense pads, underlayment beneath flooring or a floating floor reduces impact noise at the source. In many cases, treating both the floor above and the ceiling below delivers the best result.
Common Mistakes to Avoid
- Relying on acoustic foam. Foam panels reduce echo inside a room but do almost nothing to stop noise passing through a ceiling.
- Ignoring flanking paths. Sound can travel through walls, ducts and light fixtures. A strong ceiling with leaky edges will underperform.
- Covering recessed lights improperly. Recessed fixtures need to be IC-rated before insulation touches them, and fire-rated assemblies must stay compliant. Use acoustic-rated covers or sealed fixtures instead.
- Skipping local rules. Building codes, fire ratings, HOA rules and lease terms can affect what you may change, especially in multi-family buildings.
- Choosing by price alone. Cheap single-product fixes rarely solve impact noise.
What Does Ceiling Soundproofing Cost in the USA?
Costs depend on region, ceiling size, access and method. General ranges:
- Sealing and caulking: Typically under $100 in materials.
- Insulation in accessible cavities: Roughly $1 to $3 per square foot.
- Second drywall layer with damping compound: Roughly $3 to $8 per square foot installed.
- Clip and hat channel decoupled system: Often $6 to $14 per square foot or more.
- Suspended or full custom assemblies: Priced per project.
These are estimates only. Labor is typically higher in large metro areas like New York, San Francisco and Los Angeles than in smaller markets, so request written quotes before you commit.
DIY or Hire a Professional?
Sealing gaps and adding insulation are manageable for many DIYers. Decoupled ceilings, however, depend on precise layout, correct screw placement and proper handling of lighting, ducts and fire-rated assemblies. Working overhead with heavy drywall is also physically demanding, and mistakes can cancel the benefit of the whole system.
For a tailored plan, the team at Silent Guard Acoustics Pro can assess your noise problem and recommend a solution that fits your space and budget. You can also look through their acoustic and soundproofing solutions to see what is available for homes, apartments and commercial spaces.
Quick Checklist Before You Begin
- Identify the noise. Voices and TV are airborne; footsteps and thumps are impact noise.
- Seal first. Gaps undermine every upgrade.
- Combine methods. Decoupling, mass, damping and insulation work best together.
- Check height. Decoupled ceilings reduce ceiling height by a few inches.
- Confirm permissions. Review codes, HOA rules and your lease before starting.
Final Thoughts
A quiet ceiling makes a home feel calmer, more private and more comfortable. Whether you are dealing with noisy upstairs neighbors, a busy household above or a media room below a bedroom, a thoughtful ceiling soundproofing plan can make a real difference.
Start with the simple, low-cost fixes, then build toward decoupling and added mass for stubborn problems. And for more helpful reads on everyday living, take a look at the articles on TalkMisty.